Unzip the file you received from the IQS or IQCS unit to a folder on your network drive. The file with the .xml extension can be selected to transfer into the database. The other files can be saved as attachments for the individual once the person has been successfully imported into your database.
Left click on the Tools/Transfer In Persons menu option.
Left click on the Browse button ![]() to locate the file that you would like to access to transfer in a person's information. A window will open that will allow you to locate the file. Either double click on the file you would like to transfer in or you can highlight the file and click on the Open button
to locate the file that you would like to access to transfer in a person's information. A window will open that will allow you to locate the file. Either double click on the file you would like to transfer in or you can highlight the file and click on the Open button ![]() to have it appear in the browse box.
to have it appear in the browse box.

When you have located the file that you would like to transfer in left click on the Transfer In button ![]() .
.
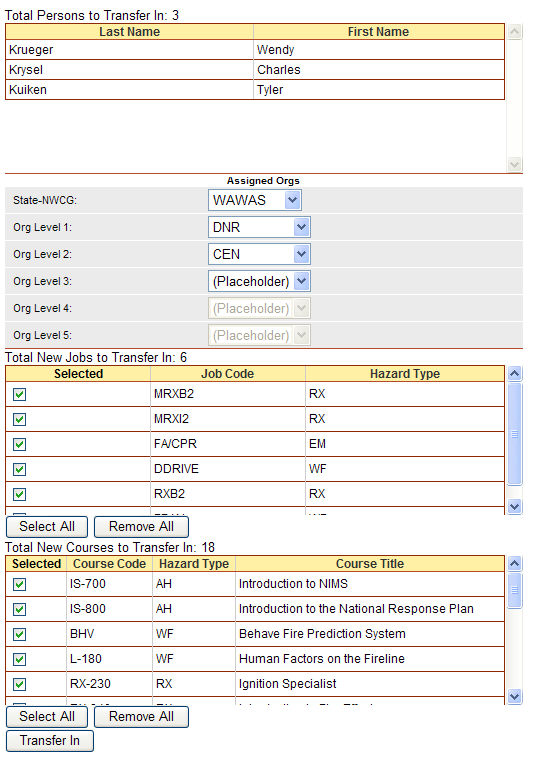
A new screen will appear as shown below.
-
The organization codes need to be assigned for all of the incoming individuals as a group. Using the drop-down lists select the assigned organizations for the incoming individual(s). Once these individuals are in the database the organization codes can be changed through the Person/Org screen.
-
Any jobs and courses that come with these individuals are NOT currently in your database they will be listed in 2 grids below the Assigned Orgs box. These new course or job codes will automatically be created in your Jobs and Courses reference tables if they have a checkmark under the column heading "Selected". If you do not want to add any of these new codes in your reference tables you can unselect the checkbox so that new job codes and/or course codes will not be created in your database. However, if you select to not import one or more of the codes listed, these certifications will not be imported with the persons who have these jobs or courses as part of their record.
-
If you wish to unselect all of the job or course codes click on the Remove All button
 .
. -
To select all of the job or course codes click on the Select All button
 .
. -
If you would like to unselect one or two your job or course codes you can click on the checkbox
 to the left of the code that you have chosen.
 -
Left click on the Transfer In button
 when you are ready to transfer in the data to your database
.
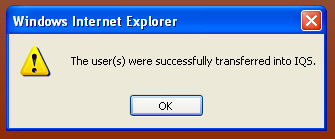
A new dialog box will appear indicating that the Persons were successfully transferred into your IQS database. Click on the OK button ![]() to complete the transfer and return to the Transfer In Persons screen.
to complete the transfer and return to the Transfer In Persons screen.
