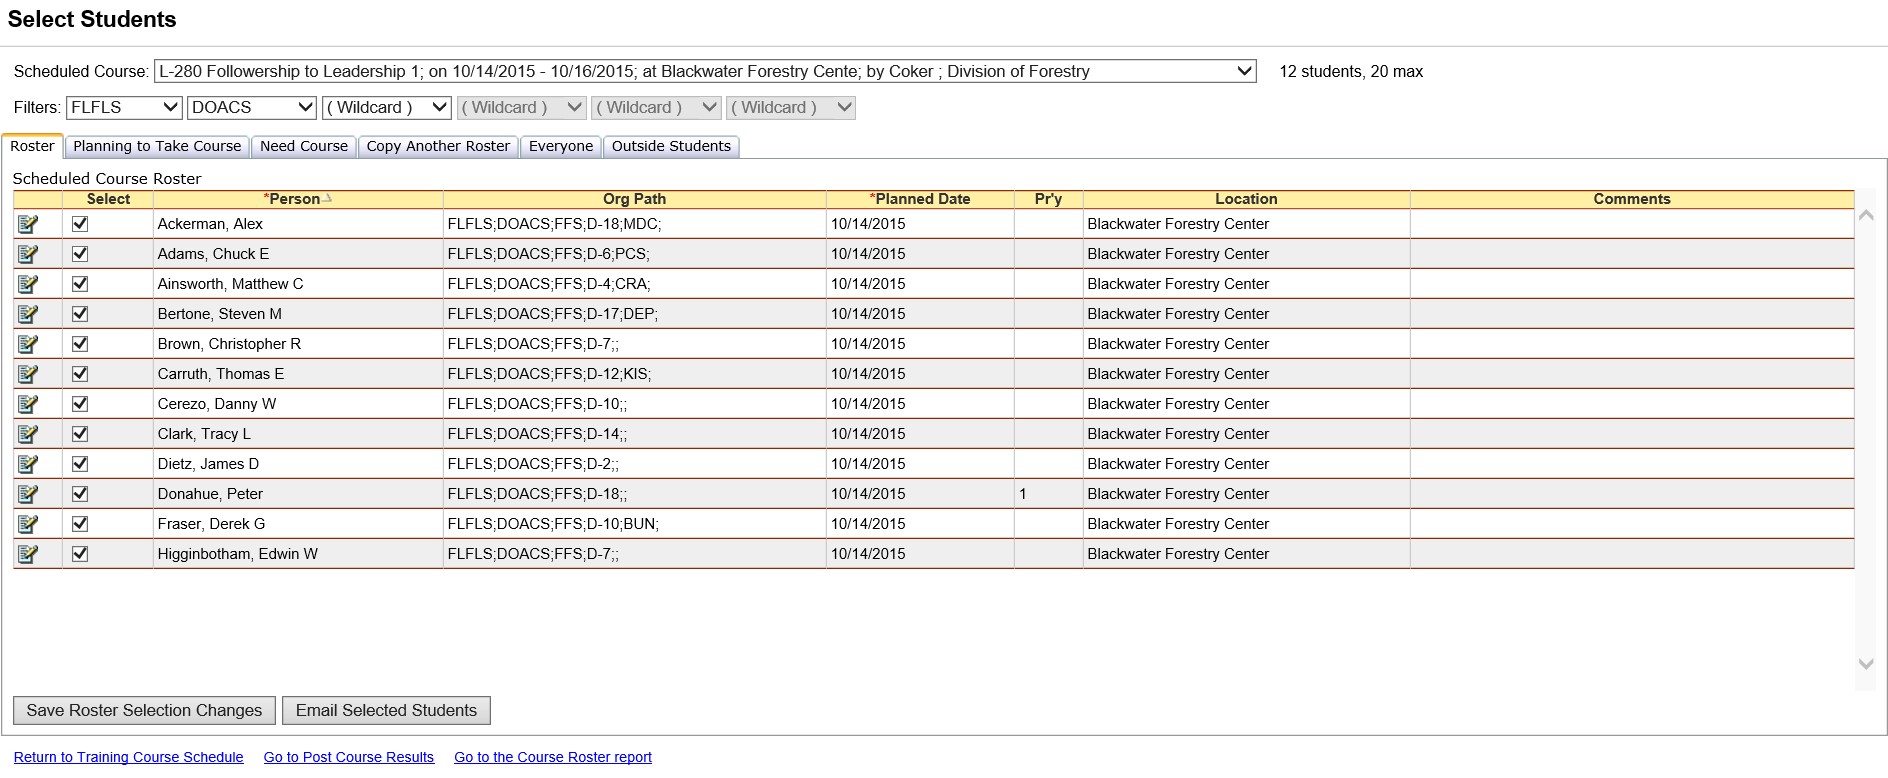
This screen allows the user to select the attendees for each training course that is scheduled. Selected students will have a planned training record, which can be viewed in Certifications/Training, with the same planned date and location as the scheduled course.
There are 6 tabs available for student selections.
Roster - this tab displays all the students (within the orgs you have defined in the filter) that have been selected for the course. A student is considered selected for the course if they have the training planned the same date and location as the scheduled course.
Planning to take Course - this tab displays the students (within the orgs you have defined in the filter) who currently have the training planned regardless of the date or location.
Need Course - this tab lists individuals (within the orgs you have defined in the filter) whose target position requires the course and they haven't yet planned or completed the course.
Copy Another Roster – this tab allows you to choose another course’s roster to copy into the course you are making student selections for.
Everyone - this tab lists all persons (within the orgs you have defined in the filter). This list can be used to add persons to the roster that are not on the other lists.
Outside Students - this tab allows you to add students to the roster who are NOT in the IQS database. These students will only be associated with this course. Their name or other information is not available for re-use in any other parts of IQS or on another course.
Reports are available to create a course roster (via Go to the Course Roster report link at the bottom of the page) or create a training nomination form along with many other training reports available via the Reports menu.
Click the Email Selected Students button at the bottom to createan email to yourself which blind courtesy copies (bcc) a list of all students selected on the current tab. Email addresses can be added for individuals via the Person/Org screen. An email subject line, message and attachments can be added prior to sending the email. Attachments are added by opening the File Explorer used by your operating system and dragging the selected file to the attachment drop portion of the email

Select Training/Course Schedule from the IQS menu.
Click the ![]() link next to the scheduled course for which you want to select students. It is located under the column heading "Select" to the far right of the screen.
link next to the scheduled course for which you want to select students. It is located under the column heading "Select" to the far right of the screen.
From the Students Selections screen, you can choose a different Scheduled Course to view candidates for by using the Drop-down list button ![]() .
.
If your id has a default OLA specified, those values will be displayed in the filter when you enter this screen. The filter is automatically applied.
The total number of students selected for the course is displayed in the upper right. This is the total for all organizations. If a maximum number of students is entered for the course, that number will be displayed also.
Inspect the Roster grid. You can add students to this grid by selecting them from the other tabs.
You can also de-select individuals for the course from the Roster grid. When a person is de-selected, the location for their training record is set to blank, but the course is still planned and that person will be listed on the tab Planning to Take Course. If you do not want the person to have this training planned, then you must go to Certifications/Training and delete the planned training from their record.
Use the Planning to Take Course grid to select or de-select individuals for the course who have the course planned for a date or location other than the scheduled course.
Use the Need Course grid to select or de-select individuals for the course who have a target position that requires the course.
Use the Copy Another Roster grid to add a new person to the roster from a roster of a previously scheduled course.
Use the Everyone tab to add a new person from the database that doesn't have the course planned or need the course.
Use the Outside Students tab to add a person to the roster that is NOT in your IQS database, for example someone from an outside agency.
Click the ![]() link at the bottom when you are finished selecting students.
link at the bottom when you are finished selecting students.